Ever since my interest in photography began, it has always been pictures of the night sky that have been my biggest source of inspiration. I can remember countless times throughout life where I have often found myself staring up at the stars and I am sure that each and every one of us at some point have found themselves doing the exact same thing.
For me, it induces an overwhelming sense of the unknown. What else exists out there, where and how did it all begin? I still find it incredible to think that each time we look up to the night sky, the light from the stars that we see ranges from a few years old to a few thousand years old. Polaris or the North Star for example is 680 light years away from Earth, so the light that we see from it is actually 680 years old!
Photographing deep space objects is quite a challenging and complex process. It requires some specialist equipment and software, a lot of patience and, most importantly, nights without cloud. Further to this, depending on your chosen subject, you may also require a particular moon phase and even a particular time of the year where a specific area of the sky or constellation is in view within your hemisphere. As such, your ability to produce portfolio quality images of deep space objects will be much less than what you may be able to achieve with other styles of photography. That said however, when everything comes together, it is often quite a surprise as to what you can achieve without having to use a telescope.
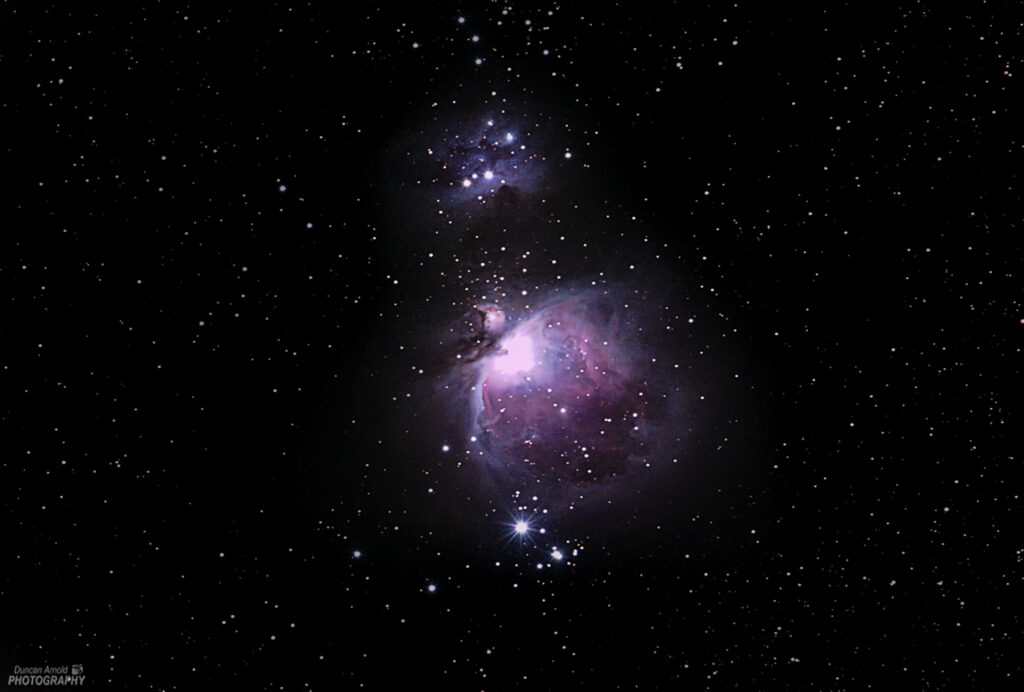
The image above is an example of what you can expect to take with any reasonably modern DSLR or mirrorless camera, a telephoto lens and a star tracker. The subject is the Orion and Running Man nebula within the constellation of Orion. It was taken with a Canon 6d (released in November 2012), a Canon 100-400mm F4-5.6 Mk 1 lens (released in September 1998) and most importantly the SkyWatcher Star Adventurer star tracker which has also been around now for a good number of years.
So, you may now be asking yourself what is a star tracker and why is it so important when photographing deep space objects? Well, this is where it gets a little bit more complicated, but bear with me while I try and explain.
Planet Earth rotates, this rotation, along with the focal length you are shooting at, will dictate the maximum shutter speed you can set before stars start to trail. A star tracker is designed to move your camera at the same speed as Earth rotation so this allows us to use much longer shutter speeds to obtain a correct exposure without any visible star trailing. It also has the benefit of allowing us to reduce our ISO and perhaps even shoot at a narrower aperture to obtain better optical quality images.
For the example image of the Orion and Running Man nebula, the focal length was 400mm, without using a star tracker the maximum shutter speed would have been limited to one second only, nowhere near long enough to capture enough light for a correct exposure. By using the star tracker, I was able to obtain a shutter speed of 90 seconds at ISO800 and an aperture of f/5.6.
Setting up your equipment to shoot a deep space object is also not a straight forward process, the star tracker needs to be completely level so you will need to adjust your tripod accordingly and you will also need to polar align the star tracker. Polar alignment involves lining your star tracker up with the north star (Polaris), the more accurate your polar alignment is, the longer shutter speeds you will be able to achieve. Once polar aligned, you will then need to point your camera at your chosen subject, ensure that you correctly focus your lens, and take test images to see how long a shutter speed you can take before the stars start to trail. This setup process once practiced a few times will take on average 10 – 15 minutes.
To get the best results when shooting deep space objects, you will also need to take multiple images and use an advanced processing technique often referred to as image stacking. Image stacking involves taking multiple images and then using specialist software to stack them, this will increase the detail and reduce noise and hot pixels within the final processed image. You may have seen people referring to light, dark, bias and flat frames, personally I only use light and dark frames and am happy with the results that this gives. Light frames are essentially the images that you take of your chosen subject. Dark frames are images taken with the exact same shutter speed, ISO and aperture values as your light frames but with the lens cover attached. The dark frames are used to identify noise and hot pixels which the software then removes from the light frames. The more images you take and stack, the better the resulting image should be.
In the example image of the Orion and Running Man nebula, I took 15 light frames at 90 seconds each and 8 dark frames also at 90 seconds each. Therefore, the total exposure time of all of the light frames was 22 minutes and 30 seconds and for the dark frames a further 12 minutes. Ideally, I would have taken more light and dark frames but on the particular night I took these images I only had a brief window before cloud moved in. I would have preferred to have had at least 30 light frames and 15 dark frames. The image below is the TIFF file created within Sequator prior to further processing and cropping within Photoshop:

Stacking the images, you will be pleased to hear is a relatively straight forward process. I use a software program called Sequator, there are many other alternatives out there such as Deep Sky Stacker and PixInsight but I find Sequator the easiest and fastest to use. You simply load your light and dark frames in to the application, set your output location, set the Composition options to align stars and accumulation, set the colour space to Adobe RGB and click start. A few seconds or minutes later depending on the speed of your computer, Sequator will create a stacked image file in TIFF format. Once complete you can then load this into Photoshop to complete the processing of the final image with colour balance, cropping and resizing.
Living on the edge of a small town that is continually expanding with new housing developments popping up all the time, light pollution is becoming an ever-increasing problem for us all. Whilst the effect of light pollution can be removed reasonably well during post processing, it is time consuming and can often alter the overall colour balance of the final image. When photographing deep space objects, I usually travel several miles outside of town to the North Norfolk coast to escape light pollution. Having recently been selected as a brand ambassador for Formatt-Hitech, I was keen to test the Firecrest Nightscape filter for photographing deep space objects and I am more than happy with the results achieved. It did an excellent job of removing light pollution and allowed me the luxury of setting up and shooting from the comfort of my back garden, so once everything is set up, I can now go back indoors into the warmth and have a cuppa whilst leaving the star tracker and camera to do its thing, perfect!
Finally, the observant amongst you may have noticed a few other accessories in the image of the star tracker and camera setup. These are:
- The Formatt-Hitech 100mm filter holder system.
- The recently released Firecrest Nightscape filter which has been specifically designed to reduce the effect of light pollution.
- A Through the Lens Workshops lens heater connected to a USB powerpack, designed to prevent the build-up of condensation on the lens element and Nightscape filter.
- Wireless remote intervalometer for setting up continuous shooting of the 90 second exposures with the camera in bulb mode.
If you would like to learn more about photographing the night sky, why not take a look at one of the workshops I run at https://www.throughthelensworkshops.co.uk. Whilst these are currently held in Norfolk, we are looking to bring them to other parts of the country in the near future where you will also be able to try out the Formatt-Hitech Nightscape filter for yourself.