Posted on

Introducing the new mk ii Firecrest 100mm filter holder from Formatt Hitech

One advantage of being a brand ambassador is getting your hands on new product developments in advance of public release. This time it is the new mk ii 100mm filter holder.

Since learning that the holder system was undergoing a refresh, I have been looking forward to getting my hands on it and seeing the improvements on the original design for myself. I was supposed to be filming the new holder with Formatt Hitech at the back end of 2020 ready for the product launch but this had to be cancelled due to Covid restrictions.

So here it is, in this review we will get our first look, first impressions, take a look at what is included, what is different and how it compares to the previous version of the Firecrest holder.

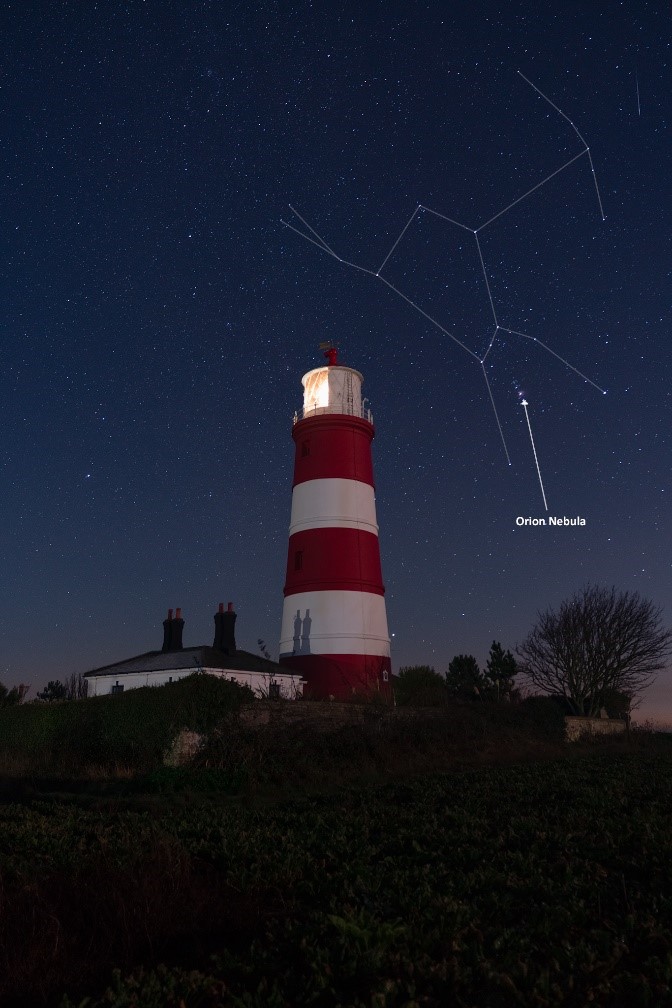
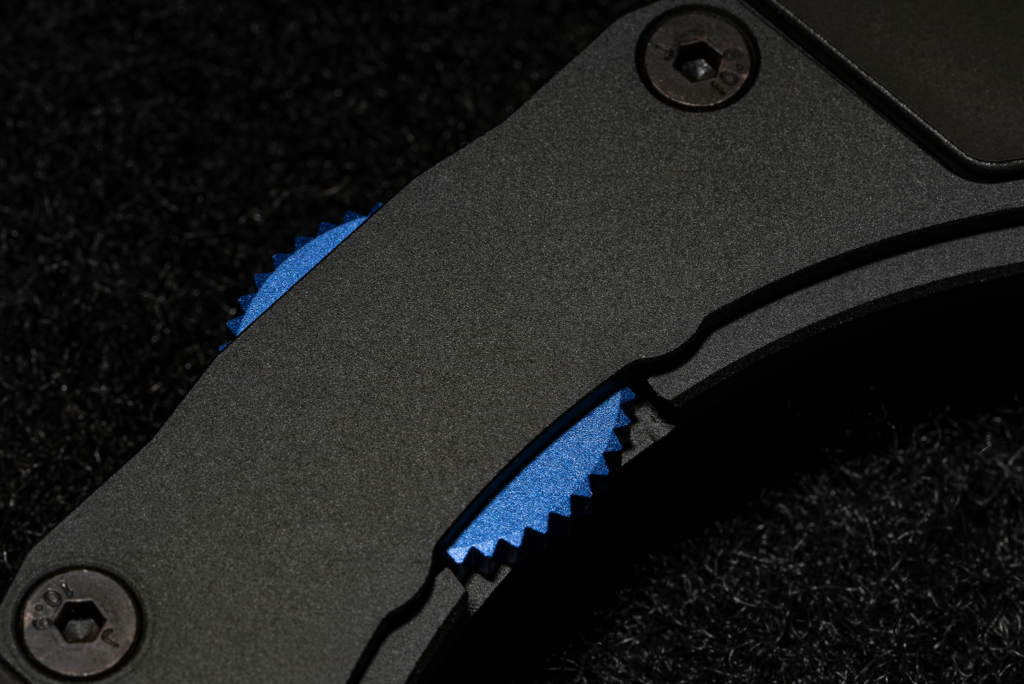
A closer look reveals a fairly substantial change in design to the previous version but also retains many similarities. The holder still utilises the end cap covers to prevent light leak when using multiple ND filters and is shipped with two sets as standard. One pair of solid end caps for 100x100mm ND filters and a pair of vented end caps to allow the use of 100mmx150mm or 100mmx125mm graduated NDs. They are though slightly different to the original in terms of only extending part way down the holder making them much easier to put in place and remove than the longer end caps on the previous version. Either slot can be used for grad filters with the vented end caps allowing you to use the closest slot to the lens if you are only using a grad filter.

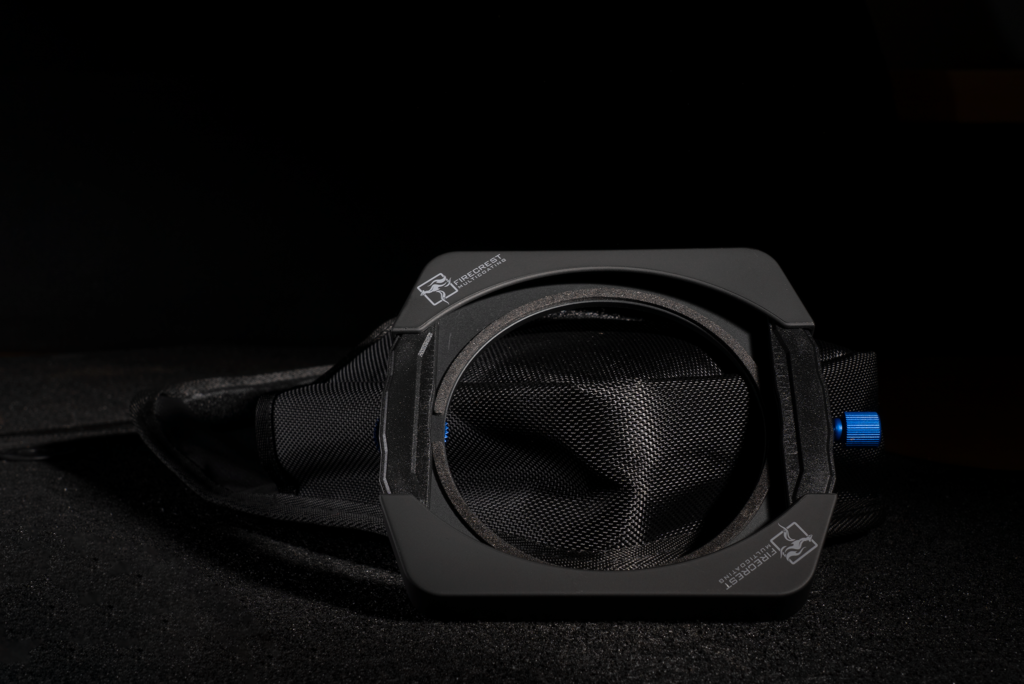
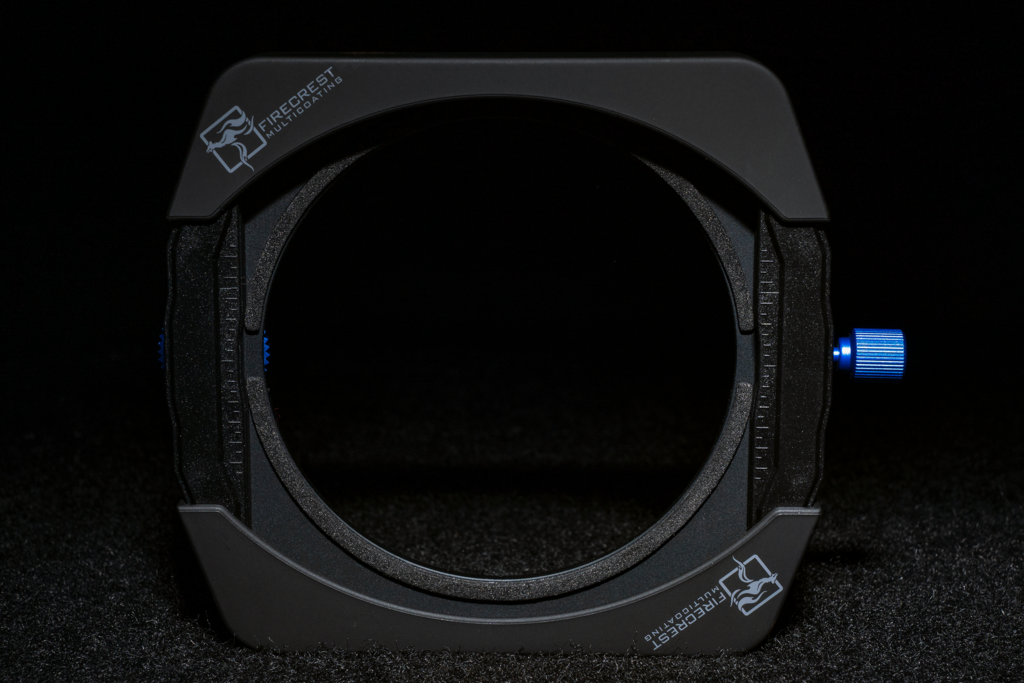
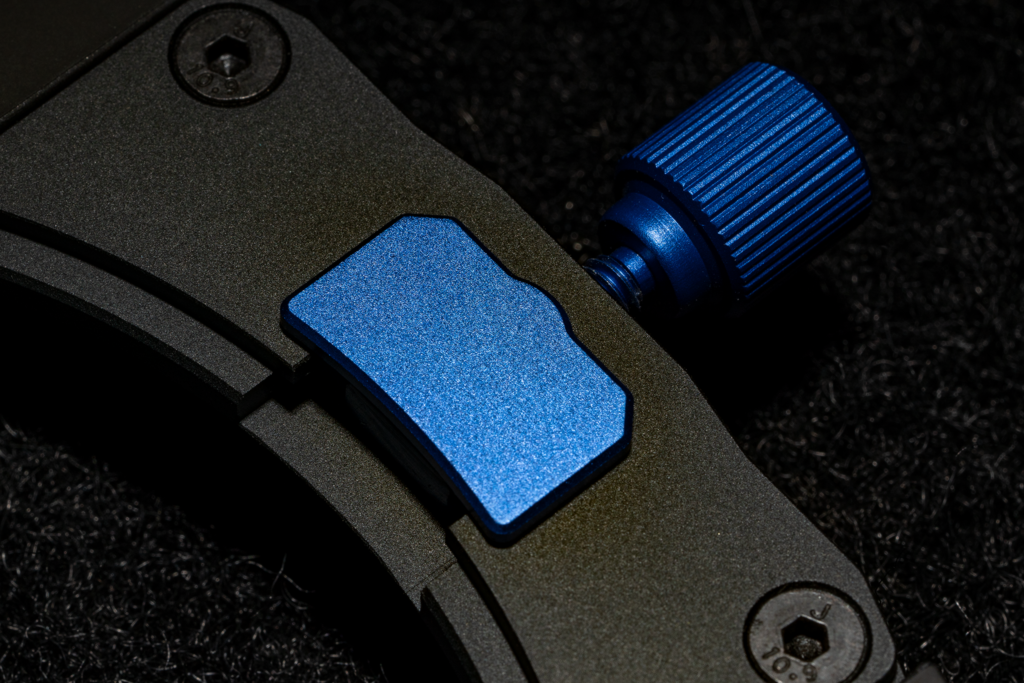
You will also notice the blue screw on the right hand side of the holder which is the re-designed method of securing the holder system to the adapter ring. The previous version had a sliding clip to attach the holder system to the adapter ring which for some owners worked loose on occasion. It is really good to see this design significantly changed as there had been a few incidents where filter holders had manged to fall off the adapter ring resulting in damaged or broken filters. I’m confident that this change in design will remove any possibility of this happening in the future which is fantastic.

Another similarity to the previous version is the positioning of the circular polariser, which is integral to the rotating adapter ring and screw threaded to allow it to be added and removed. What has changed though is the circular polariser has increased from 82mm to 86mm which should help to reduce vignetting on ultra wide angle lenses. When adding the circular polariser on the previous version, I would get a very slight vignette on my 16-35mm lens @ 16mm which was not present when the circular polariser was removed. That problem is now gone, no vignette on that lens at all with or without the polariser attached.

The integral wheel to rotate the circular polariser has also changed, not only is it now a lovely shade of blue, it is far more prominent that it was on the previous version which will make it much easier to rotate, particularly in cold weather conditions when wearing gloves which is another great improvement to see in the new design.

Also included in the kit is another pair of slats and longer screws so that you can increase the number of filters you can use within the holder from 2 to 3, when using this configuration or 3 of 3 filters however it is not possible to use the cover end caps.

So What is Included ?
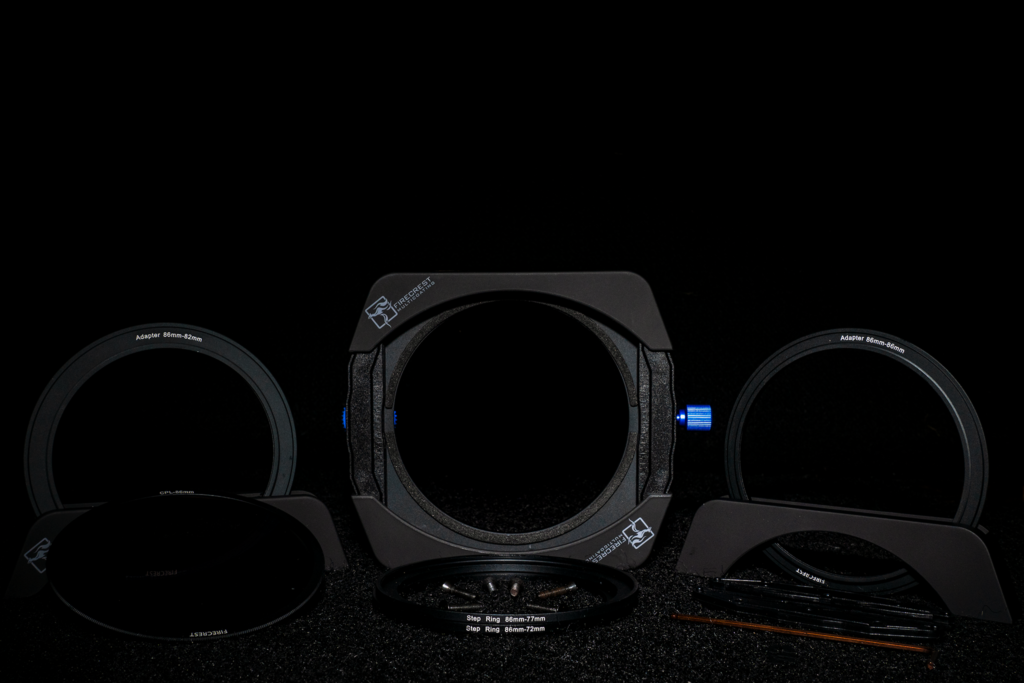
1Solid end cap covers6Additional pair of slats to allow for the use of up to 3 filters
2Vented end cap covers to allow the use of Graduated NDs7New 86mm circular polariser
3Filter holder main body8Allen key, spare screws and longer screws for additional slats
477-86mm step ring adapter982-86mm rotating adapter ring
572-86mm step ring adapter1086-86mm rotating adapter ring

The filter holder body has the same design of the previous version with an integral gasket to prevent light leak during long exposures and continues to include the end cap covers to reduce the risk of light leakage when using multiple filters in combination.

It comes with step ring and rotating ring adapters covering lens filter threads of 72mm through to 86mm and can be modified to use either 2 or 3 filters at any one time (although as previously mentioned these can only be used when using 2 filters not 3).

A closer look at the re-designed thumb screw used to secure the holder to the rotating adapter ring. This new design certainly adds much more confidence than its predecessor and again will be much easier to operate in colder weather when you may be wearing gloves.

In summary, the guys and girls at Formatt Hitech have taken what was a great design and made it even better. A number of positive refinements look like it will make the mk ii a better performer and easier to use. Most importantly the new thumb screw design should be a much more secure connection to the rotating ring adapter overcoming an intermittent issue sometimes seen with the previous design.

I cannot wait to get out and about and put this bit of kit through its paces, the new blue thumb screw and rotation wheel for the circular polariser should complement the colours of my Benro tripod and gear head !

The kit also comes with a soft spacious pouch which comfortably holds all of the supplied components as you would expect which fits nicely into the camera bag.

The inclusion of the 82mm-86mm rotating adapter ring also allows you to use existing step rings from the mk i holder for lens threads less than 72mm.

So why not treat yourself to an upgrade, don’t forget you can use my discount code DARNOLD10 for 10% off any item on either the UK or USA website – https://www.formatt-hitech.com/http://www.formatt-hitechusa.com/

Lets hope that covid restrictions are relaxed sooner rather than later so we can all get back out in the field doing what we love – stay safe and take care.

Posted on

Photographing Deep Space Objects

Ever since my interest in photography began, it has always been pictures of the night sky that have been my biggest source of inspiration.  I can remember countless times throughout life where I have often found myself staring up at the stars and I am sure that each and every one of us at some point have found themselves doing the exact same thing.  

For me, it induces an overwhelming sense of the unknown.  What else exists out there, where and how did it all begin?  I still find it incredible to think that each time we look up to the night sky, the light from the stars that we see ranges from a few years old to a few thousand years old.  Polaris or the North Star for example is 680 light years away from Earth, so the light that we see from it is actually 680 years old!

Photographing deep space objects is quite a challenging and complex process.  It requires some specialist equipment and software, a lot of patience and, most importantly, nights without cloud.  Further to this, depending on your chosen subject, you may also require a particular moon phase and even a particular time of the year where a specific area of the sky or constellation is in view within your hemisphere.  As such, your ability to produce portfolio quality images of deep space objects will be much less than what you may be able to achieve with other styles of photography.  That said however, when everything comes together, it is often quite a surprise as to what you can achieve without having to use a telescope. 

The image above is an example of what you can expect to take with any reasonably modern DSLR or mirrorless camera, a telephoto lens and a star tracker.  The subject is the Orion and Running Man nebula within the constellation of Orion.  It was taken with a Canon 6d (released in November 2012), a Canon 100-400mm F4-5.6 Mk 1 lens (released in September 1998) and most importantly the SkyWatcher Star Adventurer star tracker which has also been around now for a good number of years.

So, you may now be asking yourself what is a star tracker and why is it so important when photographing deep space objects?  Well, this is where it gets a little bit more complicated, but bear with me while I try and explain. 

Planet Earth rotates, this rotation, along with the focal length you are shooting at, will dictate the maximum shutter speed you can set before stars start to trail.  A star tracker is designed to move your camera at the same speed as Earth rotation so this allows us to use much longer shutter speeds to obtain a correct exposure without any visible star trailing.  It also has the benefit of allowing us to reduce our ISO and perhaps even shoot at a narrower aperture to obtain better optical quality images. 

For the example image of the Orion and Running Man nebula, the focal length was 400mm, without using a star tracker the maximum shutter speed would have been limited to one second only, nowhere near long enough to capture enough light for a correct exposure.  By using the star tracker, I was able to obtain a shutter speed of 90 seconds at ISO800 and an aperture of f/5.6. 

Setting up your equipment to shoot a deep space object is also not a straight forward process, the star tracker needs to be completely level so you will need to adjust your tripod accordingly and you will also need to polar align the star tracker.  Polar alignment involves lining your star tracker up with the north star (Polaris), the more accurate your polar alignment is, the longer shutter speeds you will be able to achieve.  Once polar aligned, you will then need to point your camera at your chosen subject, ensure that you correctly focus your lens, and take test images to see how long a shutter speed you can take before the stars start to trail.  This setup process once practiced a few times will take on average 10 – 15 minutes.

To get the best results when shooting deep space objects, you will also need to take multiple images and use an advanced processing technique often referred to as image stacking.  Image stacking involves taking multiple images and then using specialist software to stack them, this will increase the detail and reduce noise and hot pixels within the final processed image.  You may have seen people referring to light, dark, bias and flat frames, personally I only use light and dark frames and am happy with the results that this gives.  Light frames are essentially the images that you take of your chosen subject.  Dark frames are images taken with the exact same shutter speed, ISO and aperture values as your light frames but with the lens cover attached. The dark frames are used to identify noise and hot pixels which the software then removes from the light frames.  The more images you take and stack, the better the resulting image should be. 

In the example image of the Orion and Running Man nebula, I took 15 light frames at 90 seconds each and 8 dark frames also at 90 seconds each.  Therefore, the total exposure time of all of the light frames was 22 minutes and 30 seconds and for the dark frames a further 12 minutes.  Ideally, I would have taken more light and dark frames but on the particular night I took these images I only had a brief window before cloud moved in.  I would have preferred to have had at least 30 light frames and 15 dark frames. The image below is the TIFF file created within Sequator prior to further processing and cropping within Photoshop:

Stacking the images, you will be pleased to hear is a relatively straight forward process.  I use a software program called Sequator, there are many other alternatives out there such as Deep Sky Stacker and PixInsight but I find Sequator the easiest and fastest to use.  You simply load your light and dark frames in to the application, set your output location, set the Composition options to align stars and accumulation, set the colour space to Adobe RGB and click start.  A few seconds or minutes later depending on the speed of your computer, Sequator will create a stacked image file in TIFF format.  Once complete you can then load this into Photoshop to complete the processing of the final image with colour balance, cropping and resizing. 

Living on the edge of a small town that is continually expanding with new housing developments popping up all the time, light pollution is becoming an ever-increasing problem for us all.  Whilst the effect of light pollution can be removed reasonably well during post processing, it is time consuming and can often alter the overall colour balance of the final image.  When photographing deep space objects, I usually travel several miles outside of town to the North Norfolk coast to escape light pollution.  Having recently been selected as a brand ambassador for Formatt-Hitech, I was keen to test the Firecrest Nightscape filter for photographing deep space objects and I am more than happy with the results achieved.  It did an excellent job of removing light pollution and allowed me the luxury of setting up and shooting from the comfort of my back garden, so once everything is set up, I can now go back indoors into the warmth and have a cuppa whilst leaving the star tracker and camera to do its thing, perfect!

Finally, the observant amongst you may have noticed a few other accessories in the image of the star tracker and camera setup.  These are:

  1. The Formatt-Hitech 100mm filter holder system.
  2. The recently released Firecrest Nightscape filter which has been specifically designed to reduce the effect of light pollution.
  3. A Through the Lens Workshops lens heater connected to a USB powerpack, designed to prevent the build-up of condensation on the lens element and Nightscape filter.
  4. Wireless remote intervalometer for setting up continuous shooting of the 90 second exposures with the camera in bulb mode.

If you would like to learn more about photographing the night sky, why not take a look at one of the workshops I run at https://www.throughthelensworkshops.co.uk.  Whilst these are currently held in Norfolk, we are looking to bring them to other parts of the country in the near future where you will also be able to try out the Formatt-Hitech Nightscape filter for yourself.